Crawl-Space Dehumidifier Installation Planning
Quick answer: Installation must solve water entry, air sealing, drainage, support, power and service access as one system.
As an Amazon Associate, we may earn from qualifying purchases.
Compare Airecoler 125 Pint Commercial Crawl-Space Dehumidifier on Amazon
Solve water entry before placement
Inspect grading, gutters, downspouts, plumbing, foundation stains and standing water. A dehumidifier manages vapor after it enters the air; it does not repair liquid-water pathways. Determine whether the crawl space will be vented, sealed or conditioned under local requirements. Mixing strategies, such as leaving vents open while trying to dehumidify continuously, can waste energy. Combustion safety, radon and termite provisions need qualified attention.
Prepare the ground and air boundary
Exposed soil can impose a persistent vapor load. A durable liner or encapsulation system may need sealed seams, pier details, wall attachments and protected access. Air sealing can reduce humid infiltration through vents, rim areas and penetrations, but it must follow the chosen building strategy. Finish dusty enclosure work before commissioning the machine when practical.
Choose a serviceable location
Use a stable level pad or approved suspension method, protect the cabinet from vulnerable ground conditions, and preserve intake, discharge, filter and panel clearance. Map divided bays and remote pockets. Approved supply or return ducting may improve distribution, but added resistance must remain within published static-pressure limits. Measure the hatch and every turn along the delivery route.
Engineer drainage and power
Trace an approved condensate route before setting the unit. Gravity lines need continuous fall and support; pumped routes must meet lift, run and tubing limits. Test the final position and overflow response. Confirm voltage, current, grounding and circuit protection from the nameplate. Permanent extension cords are not a substitute for a suitable receptacle. Protect cords from water and damage.
Commission and maintain
Place independent sensors away from discharge and use multiple locations in divided spaces. Record baseline temperature and RH, setpoint, drainage and readings after several cycles. Mark model, serial, circuit and drain destination. Establish filter, coil, pan, pump and hose inspections. Remote monitoring cannot see a torn liner, new pipe leak or blocked foundation drain.
Prepare the enclosure before placing equipment
A crawl-space unit performs best as part of a water-managed, air-controlled enclosure. Inspect roof runoff, grading, foundation openings, plumbing, groundwater, sump operation, and visible standing water. Bulk water must have a reliable path away from the building. Evaluate ground vapor control and how seams, piers, edges, and penetrations are sealed; a loose sheet with open edges does not create the same load as a complete system. Determine whether existing vents will be sealed or intentionally managed under the chosen design and local requirements. Inspect wood and insulation for conditions that may need professional remediation before airflow changes. Radon, combustion appliances, pests, asbestos-containing material, damaged wiring, and structural issues can change who should perform the work. Document the crawl height and access route, since a machine that cannot be brought in, leveled, or serviced is not an installable selection regardless of its coverage claim.
Choose location from airflow and maintenance
Set the cabinet on the support method permitted by its manual, protected from soil, standing water, and an unstable vapor barrier. Maintain stated inlet, discharge, and service clearances. The intake should receive representative crawl air; the discharge should not immediately loop back or blow the barrier loose. Long or divided foundations may require an approved duct kit, transfer opening, or multiple units. Do not improvise duct length because resistance can reduce airflow and removal. Provide room to withdraw the filter, clean the drain pan, disconnect hose, read the nameplate, and reach controls. Consider vibration transmission into joists and occupied rooms. Place a separate humidity sensor in a remote risk area rather than beside the dry-air outlet. Photograph the final orientation and clearances so future storage or trade work does not gradually block them.
Commission drainage, controls, and remote zones
Confirm the dedicated or otherwise approved electrical supply using the exact nameplate and local requirements; crawl-space extension cords are not a permanent installation plan. For gravity drainage, verify continuous fall and a protected termination. For pumping, measure lift and route, secure tubing, and verify the documented overflow response. Set an initial humidity control band based on the enclosure and professional plan rather than choosing the lowest setting. Operate through several cycles, observe condensate reaching the receptor, and compare independent sensors at the unit, far end, and known damp zone. Recheck after rain and after seasonal temperature changes. Log filter, coil, pan, hose, and pump maintenance. The installation is complete only when remote conditions trend appropriately and every service item remains reachable, not when the display first reaches its setpoint.
Products to compare for this decision
The products below are exact Amazon catalog records selected for this topic. We have not hands-on tested every machine. Confirm the current variation, seller, capacity conditions, electrical requirements, drainage configuration, warranty and availability before buying.
As an Amazon Associate, we may earn from qualifying purchases.
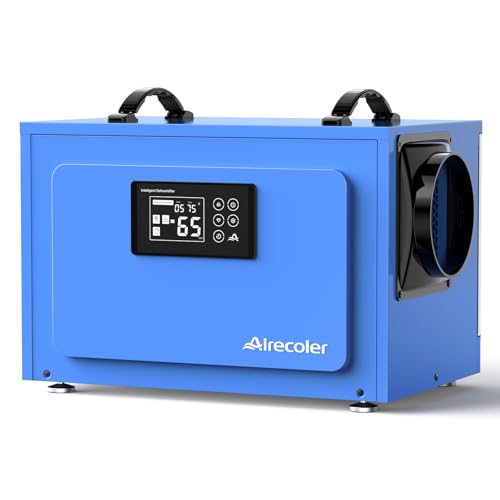 B0CVS5G92Z
Airecoler 125 Pint Commercial Crawl-Space Dehumidifier
125-pint class; crawl-space and basement positioning. Verify every listed specification and variation on Amazon before ordering.
Check on Amazon B0BS41L689
ALORAIR 70 PPD Crawl-Space Dehumidifier With Pump
70-PPD listing; crawl-space form; pump. Verify every listed specification and variation on Amazon before ordering.
Check on Amazon B0F5MYJF7Y
Waykar 125 Pint Crawl-Space Dehumidifier With Pump
125-pint class; pump and hose; compact cabinet. Verify every listed specification and variation on Amazon before ordering.
Check on AmazonFrequently asked questions
Should it sit on soil?
Use stable approved support and protect it from standing water.
Should vents stay open?
That depends on the designed enclosure and local requirements.
Where should the sensor go?
Away from discharge and wet surfaces, with additional sensors in remote bays.
Final verdict
The correct crawl space dehumidifier installation decision follows documented site conditions rather than a headline coverage claim. Control water sources, compare exact performance at relevant conditions, design power and drainage, preserve service access, and validate the finished system with independent measurements.
Continue the research
Industrial Dehumidifier for a Warehouse: Capacity and Layout Guide
Warehouse selection starts with cubic volume, infiltration, door cycles, product sensitivity and the humidity target.
Open guide →Large Industrial Dehumidifiers: What “Large” Should Mean
A large cabinet is not necessarily a well-sized system; compare rated removal, airflow, external static pressure and operating conditions.
Open guide →Industrial Dehumidifier With Pump: Drainage Buying Guide
A pump solves elevation, not bad drainage design. Verify lift, run, tubing, alarm behavior and service access.
Open guide →Commercial Dehumidifier Sizing: A Practical Planning Method
Use volume, starting humidity, temperature, infiltration and moisture generation rather than relying on a coverage-area badge.
Open guide →Use the commercial sizing calculator or return to the commercial dehumidifier guide.